
Last Updated on January 16, 2024 by Dr. Ashley Söderlund
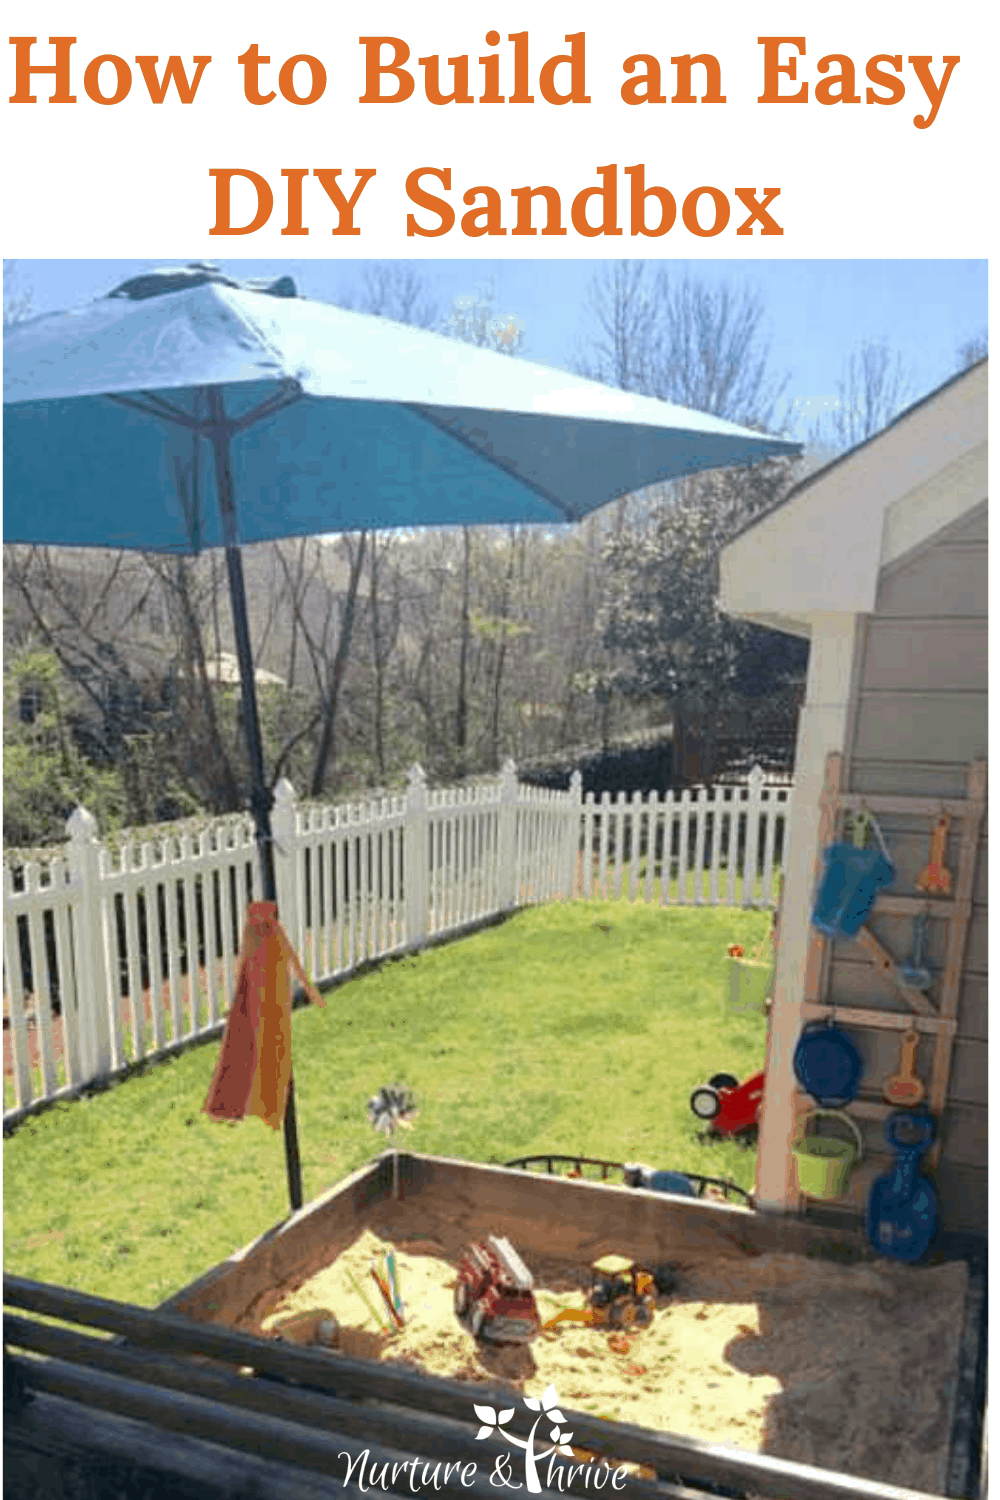
Inside: A step-by-step guide for building a large and non-toxic sandbox for kids! This is an easy to build sandbox with shade, a bench, a flowerbox, and storage for sand toys!
This Christmas my sister’s family came to visit. Her oldest and my son are just about one year apart and are best buddies. Their absolute favorite thing to do, hands down, is to run.
In fact, “running” was my son’s New Year’s Eve resolution. This was a resolution that was decidedly not broken unless we adults did something about it.
And while running is certainly fun, there is a point when we all need a break from the sound of shrieks and bare feet smacking on the floor.
Because they are both high energy, the one thing that occupies them (other than running!) is doing something with their hands — something sensory.
Tinker toys and play-dough got some good use, but the sandbox was a huge hit!
One afternoon, they played together uninterrupted for two hours by themselves! My sister and I were careful not to disturb the hole digging scenario that was happening and we were able to kick back and have a good sister-to-sister talk.
I was so thankful we built that sandbox last Spring! We looked at a lot of sandbox ideas — everything from toy storage to drainage — and this plan incorporates all of those things!!
Five Steps to Building the Best Non-Toxic DIY Sandbox
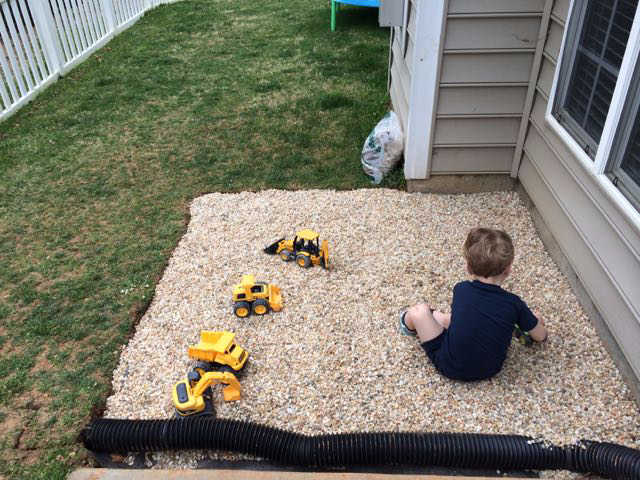
Step One: Prep the area
We have our sandbox next to the house because of the shape and size of our yard and also because that is where we needed to lay the french drain.
We dug down as far as we needed for the drain, which was about 4 inches. Depending on your soil, this is the hardest part! We have hard red clay.
Sandbox Idea #1: Add Drainage
My hubby had the idea to layer the bottom with pea gravel (which is really cheap at your lawn store).
This has two benefits — first, it helps the sandbox drain and remain mold-free (even over clay soil) and second, it keeps ants from building colonies directly under the box — or any other burrowing bugs or critters.
Step Two: Non-Toxic Wood Treatment
You have a few choices here. You can buy pretreated wood from your hardware store, you can use cedar or any other naturally rot and termite resistant wood or you can buy untreated wood and seal it yourself.
In our area, cedar is expensive and was not in our budget, but I do think it is the best choice for a non-toxic wood. If you live on the West coast, this or a redwood might be a relatively affordable option for you.
Chemically treated wood can be unsafe for children and was banned for use for play equipment in 2003. So the cheapest option for us was to buy untreated wood and seal it ourselves.
We used something similar to this, ECO-SAFE Wood Treatment – Stain & Preservative by Tall Earth – 1/3/5 Gallon Sizes – Non-Toxic/ VOC Free/ Natural Source (1 Gallon)![]() .
.
It comes as a powder which you mix with water and then you brush it onto the wood. One package was enough for both our sandbox and a garden box we made.
This kind of wood treatment is safe both for kids and for gardens and will help provide resistance to pests, although it is not specifically termite resistant.
Step Three: Build the Box!
This is the easiest part! We bought four 6-foot pieces of lumber sized 2X10 inches. If you have a younger child, you may consider an 8-inch or even 6-inch high board as it will be easier for them to step in and out of the box.
First, screw the four boards together in a square.
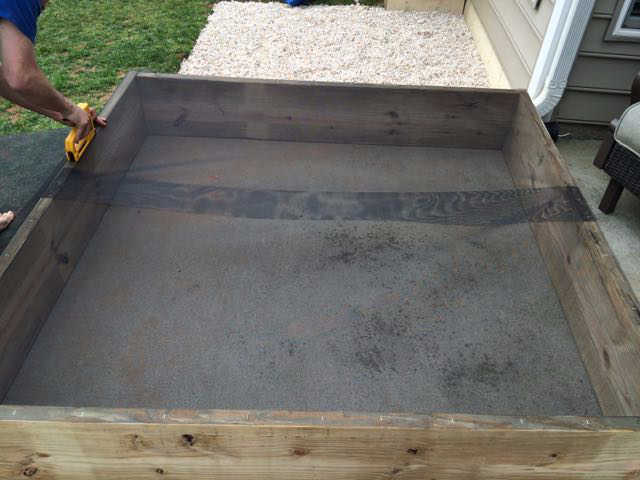
Sandbox Idea #2: Use Window Screen as a Liner
Then, staple on window screen fabric (which came on a roll) to the bottom of the box.
The screen separates the sand from the gravel while letting rainwater through and creates another deterrent for pests.
Several years later I am happy to say the screen is intact — which not the case when we used landscape fabric in a smaller sandbox at our old house.
Step Four: Build the Bench and Flower Box
Both of these ideas are optional.
You could get the same effect from planting flowers in the ground right next to the sandbox or in pots.
We did the flower box to accommodate the french drain — and I love how it looks and my son loves watering the flowers.
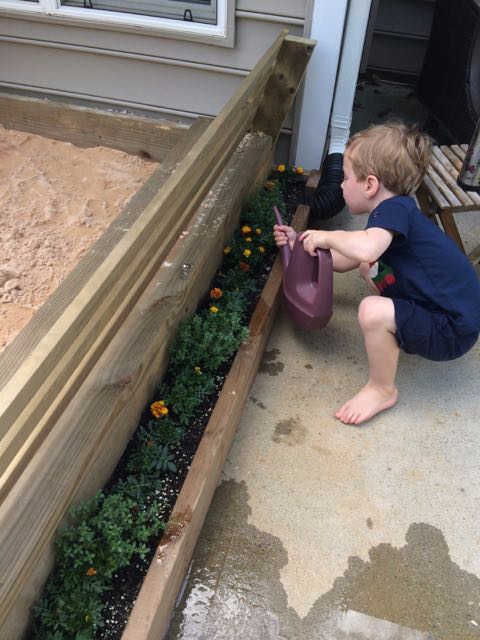
Sandbox Idea #3: Add a Flowerbox
The flowerbox is one 6-foot piece of 2×6 lumber and two 6-inch pieces of 2X6 lumber. We created the frame and then screwed it into the sandbox. Add dirt and flowers and you’re done!
Sandbox Idea #4: Add a Bench
The bench is great as well– especially if your kids want you to join in the play!
That way you can sit with your feet in the sand, but you don’t have to sit in the and itself.
Unlike the benches that become lids, this is a larger bench that an adult can actually sit on.
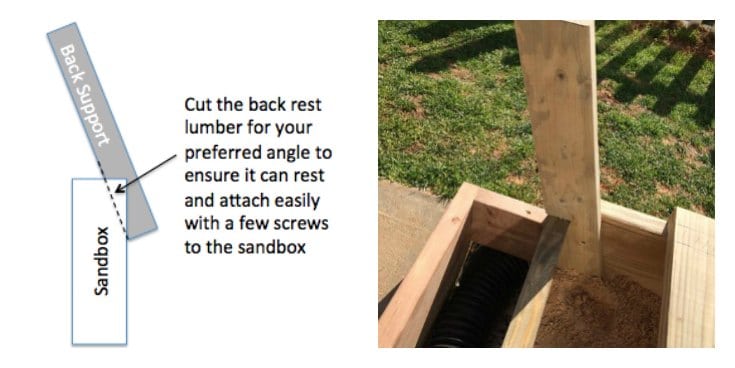
The first step is to cut the angled pieces for the backrest. As you can see in this picture, we used an angled piece of 2X4 lumber for proper support.
The seat was one piece of 2×12 lumber. The 12-inch depth makes it comfortable for an adult to sit on. We cut the seat so it inserted into the backrest supports and finished it with four pieces of 1×3 lumber to create the back of the seat.
Step 5: Fill the Box and add Accessories
As you add the sand you can add in cinnamon as a repellent to ants.
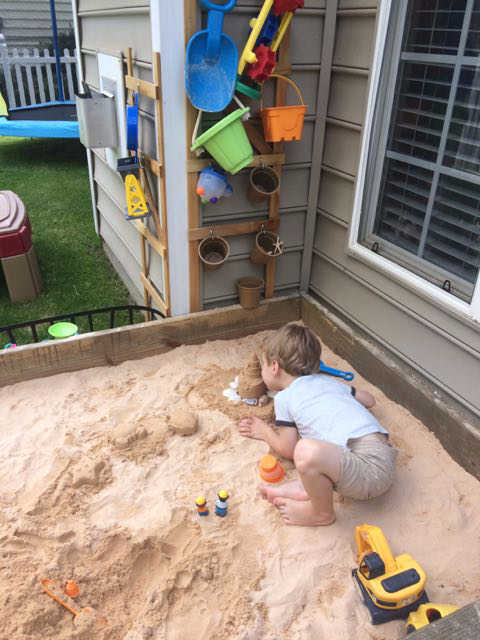
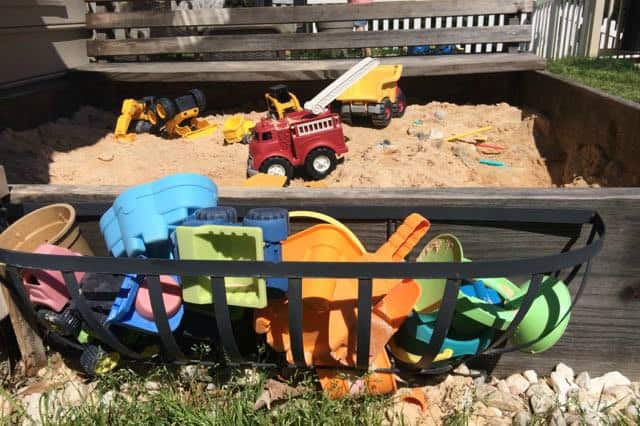
Sandbox Idea # 5: Add Toy Storage and Organization
We added two garden trellises with hooks for shovels and buckets. We also added an outside planter for more places to store toys — an idea we got from Happy Hooligans. Click over for more great ideas for sandbox play and organization!
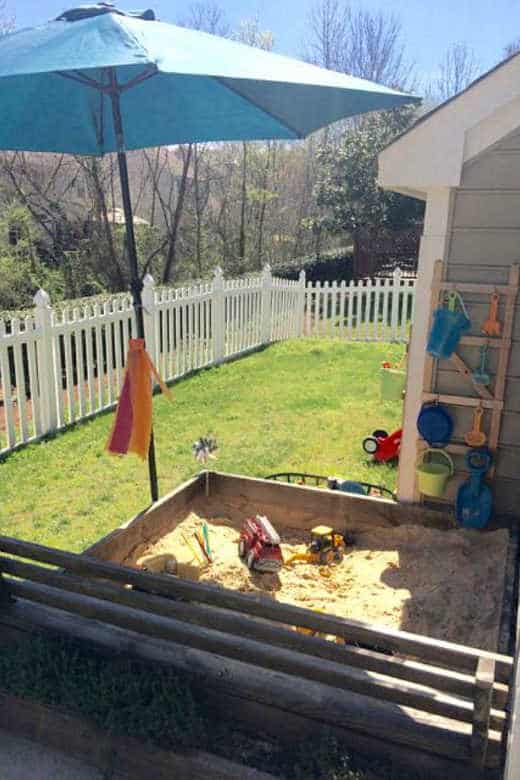
Sandbox Idea # 5: Add Shade
For shade, we affixed a bit of PVC pipe to the side of the box and an umbrella. The umbrella tilts for maximum shade — important for our summer mornings.

Happy playing! Do your kids love playing in a sandbox? Let me know in the comments below!
See all of my Play Spaces and Playrooms!!
Create A Playroom that Will Grow with Your Child: Ages 3 to 5
Create a Montessori Play Area for Your Baby or Toddler
Create a Makerspace Playroom for Big Kids

 How to Create a Play Area for Your Baby or Toddler
Wow this is a nice setup! Though this is kinda takes a lot of work and our soil outside the house is kinda difficult to dig up. Would probably ask help from others. Thanks for sharing this nice post!
Another good tip to keep bugs away from the sandbox is to sprinkle cinnamon in the sandbox. Might sound a little crazy but it works